Subscribe to the MacRumors YouTube channel for more videos.
With that in mind, here are 10 quick macOS tips that once you start using should make the time you spend on your Mac a more effortless experience. The following assumes you're running macOS Ventura, but most if not all of these tips should work on earlier versions of Apple's Mac operating system.
1. Open a Copy of a File by Default
Stationery Pad is a handy way to nix a step in your workflow if you regularly use document templates on your Mac. The long-standing Finder feature essentially tells a file's parent application to open a copy of it by default, ensuring that the original file remains unedited. Almost any file type can be defined as a template with Stationery Pad – it could be used to streamline common Photoshop jobs, create skeleton HTML/CSS files, or help with Word document invoicing.
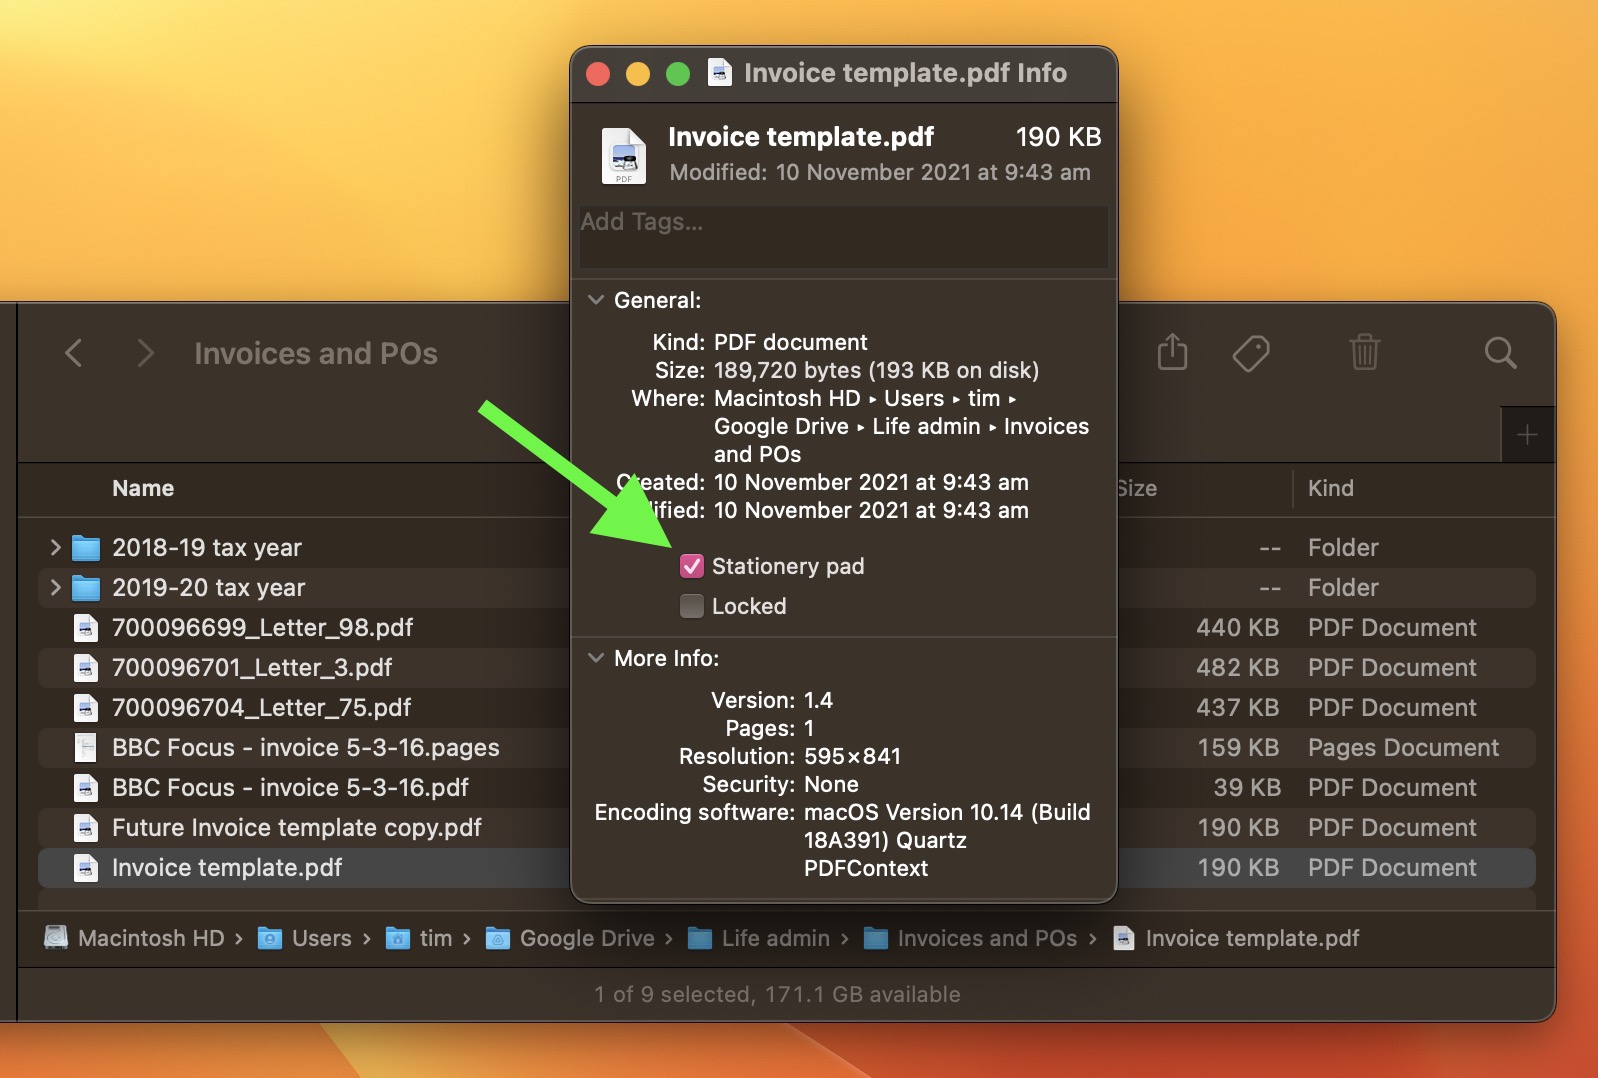
To take advantage of it, right-click (Ctrl-click) the file that you want to use as a template, select Get Info, then check the Stationery Pad checkbox under the General section. Lastly, click the red traffic light button to close the Get Info window. Next time you double-click the template file, Finder will automatically create and open a copy of it, leaving the original untouched.
Stationery Pad doesn't get much attention these days, but it's a neat alternative to repeatedly editing templates and using the "Save As..." command, which can lead to overwriting the original file if you're not too careful.
2. Access More Preview File Format Options
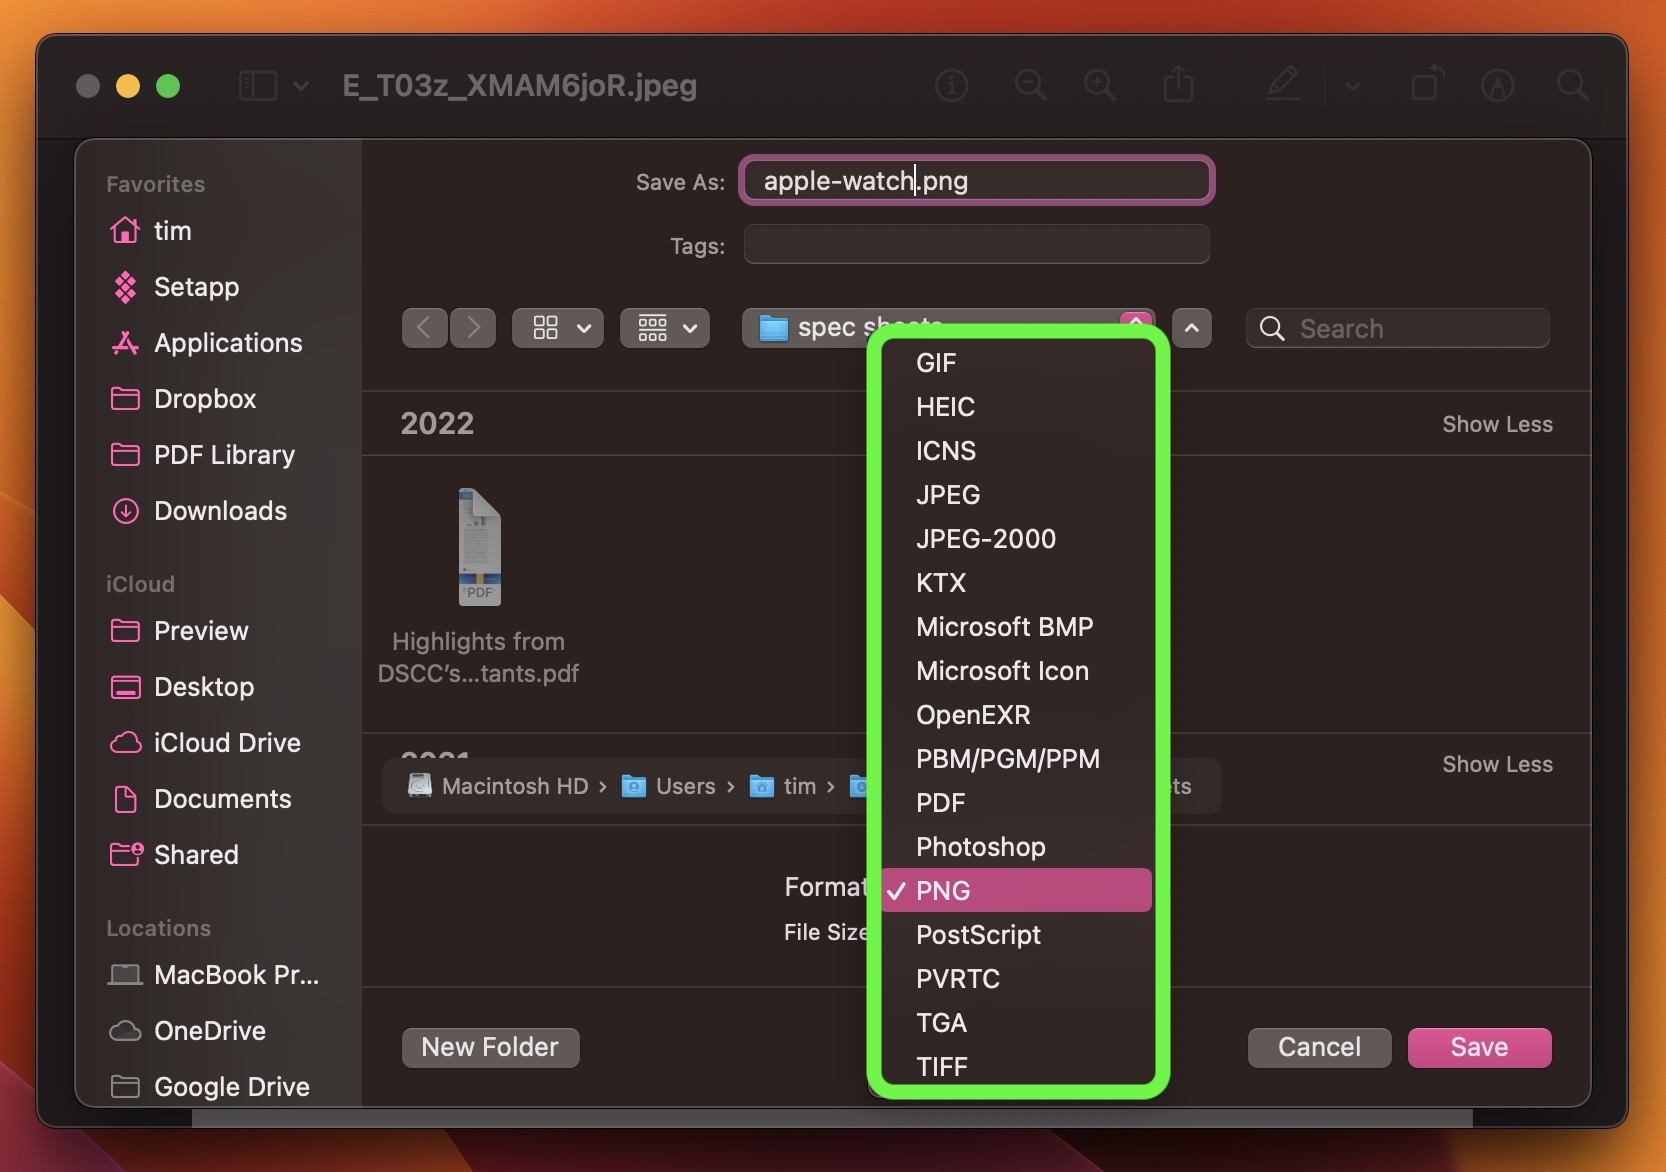
When you come to save or export a file in Preview, Option-click the Format dropdown to get access to several additional file types.
3. Snap Back to Your Safari Search Results
Say you want to look up a topic online, so you type a search word or phrase into Safari's address bar. The first link in the returned results looks promising, so you click it. On the site you're sent to, you see another link about a related topic, so you click that, too. Then another link grabs your attention, and you decide to check it out. Soon you're distracted by some other tangential subject, and before you know it you've fallen down a rabbit hole of clicks and links without finding out much about what you were actually looking for in the first place.
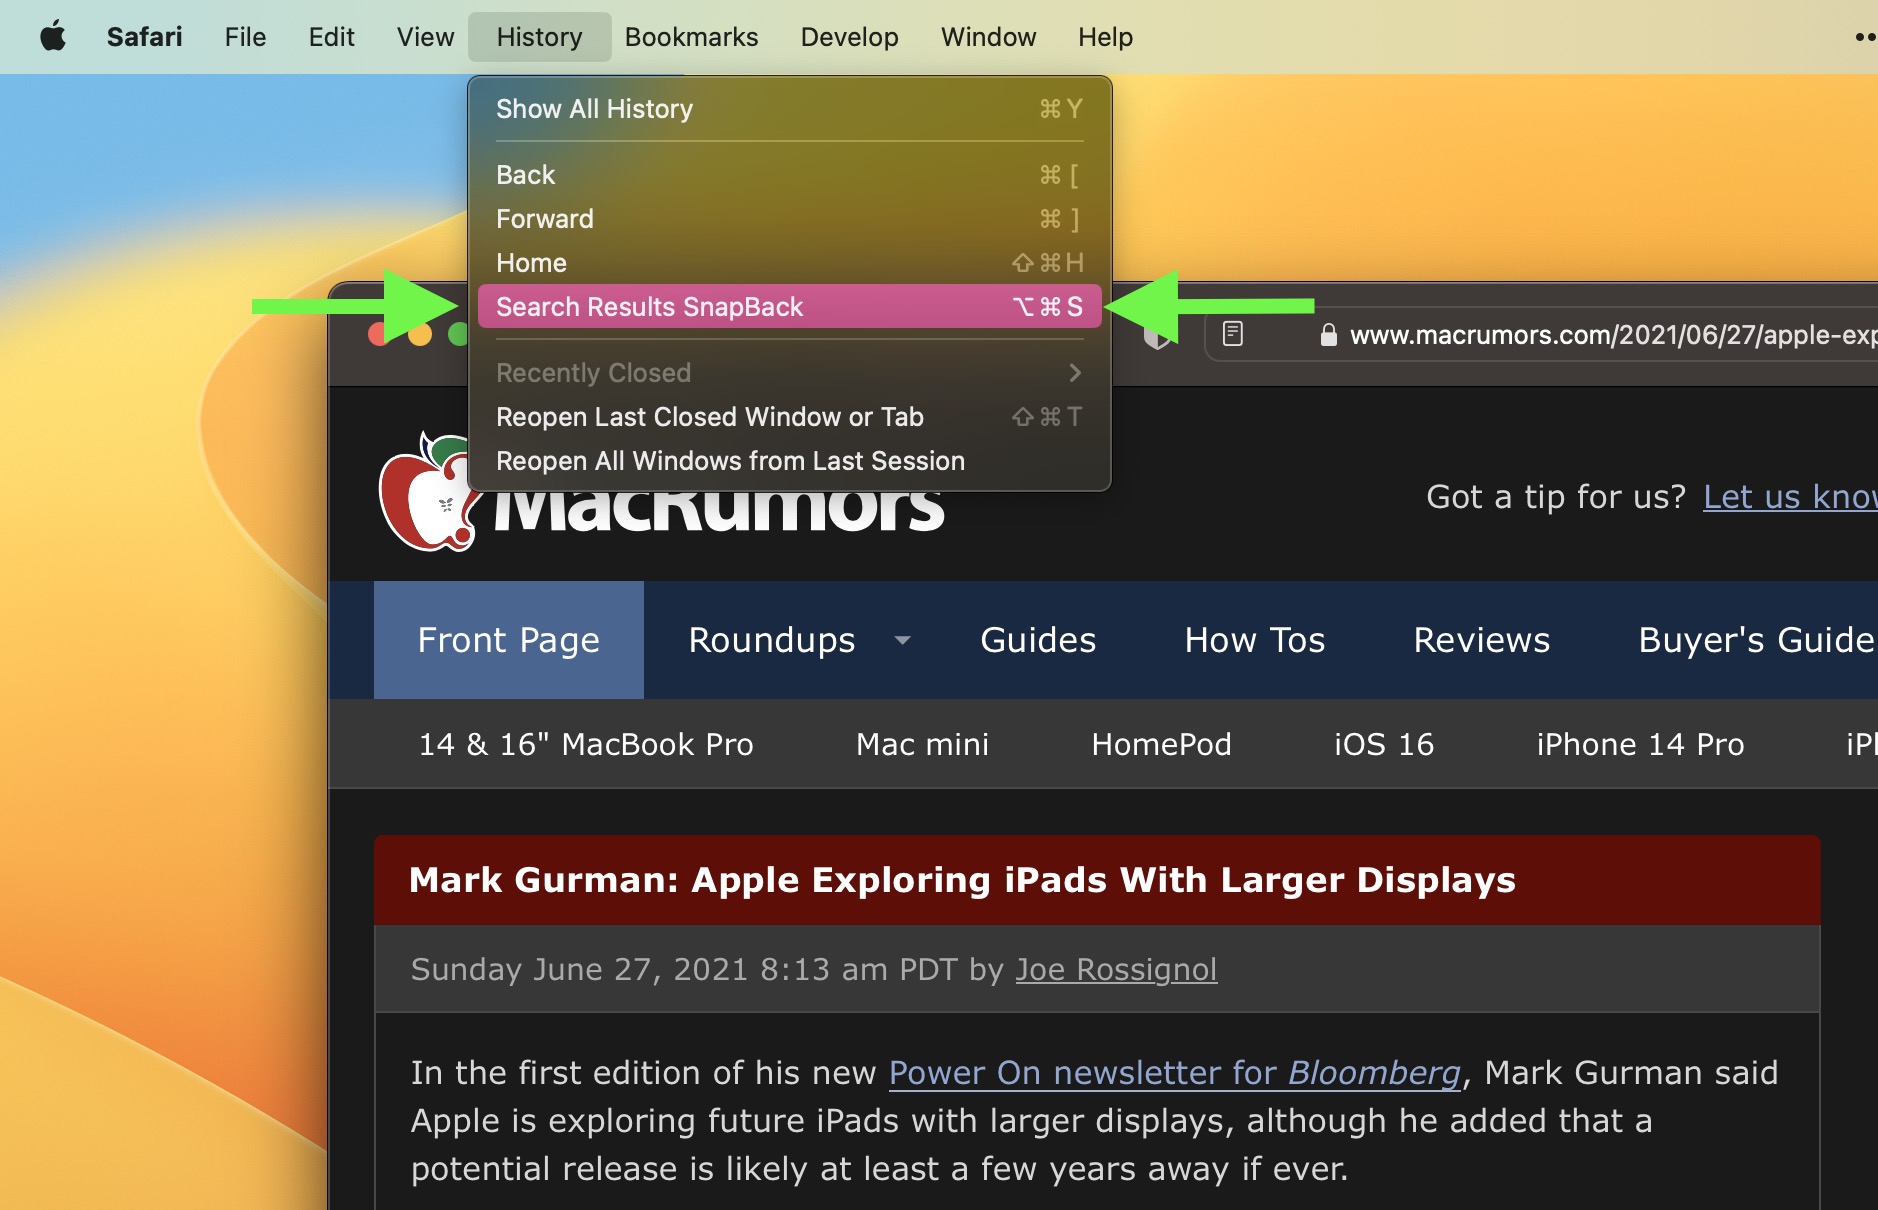
If that sounds familiar, Safari SnapBack can help. It saves having to tediously click the previous page button multiple times to return to your original search results, or start rooting through your web history to locate where your latest online meander began. You can find it in Safari's menu bar, under History -> Search Results SnapBack, or even better, use its Command-Option-S keyboard shortcut.
Note that SnapBack only works if your wayward browsing occurred in the same tab that you used to initiate the search, so if a link you clicked on opened a new tab and you continued browsing in that, the SnapBack menu option will be grayed out. Also, the search needs to be performed from Safari's address bar or from the website of the search engine that Safari is set to use.
4. Tame Hot Corners With Modifier Keys
In macOS, the Hot Corners feature turns each of the four corners of your screen into a designated action, allowing you to quickly access certain functions built into the system, such as Mission Control, Notification Center, the Screen Saver, and more. There's something satisfying about bringing up these commonly used functions with a simple, swift cursor movement. What isn't so satisfying is accidentally triggering a Hot Corner, which can lead to various kinds of unintended desktop behavior, such as application windows flying all over the place. Thankfully, there's a way to tame Hot Corner behavior using modifier keys.
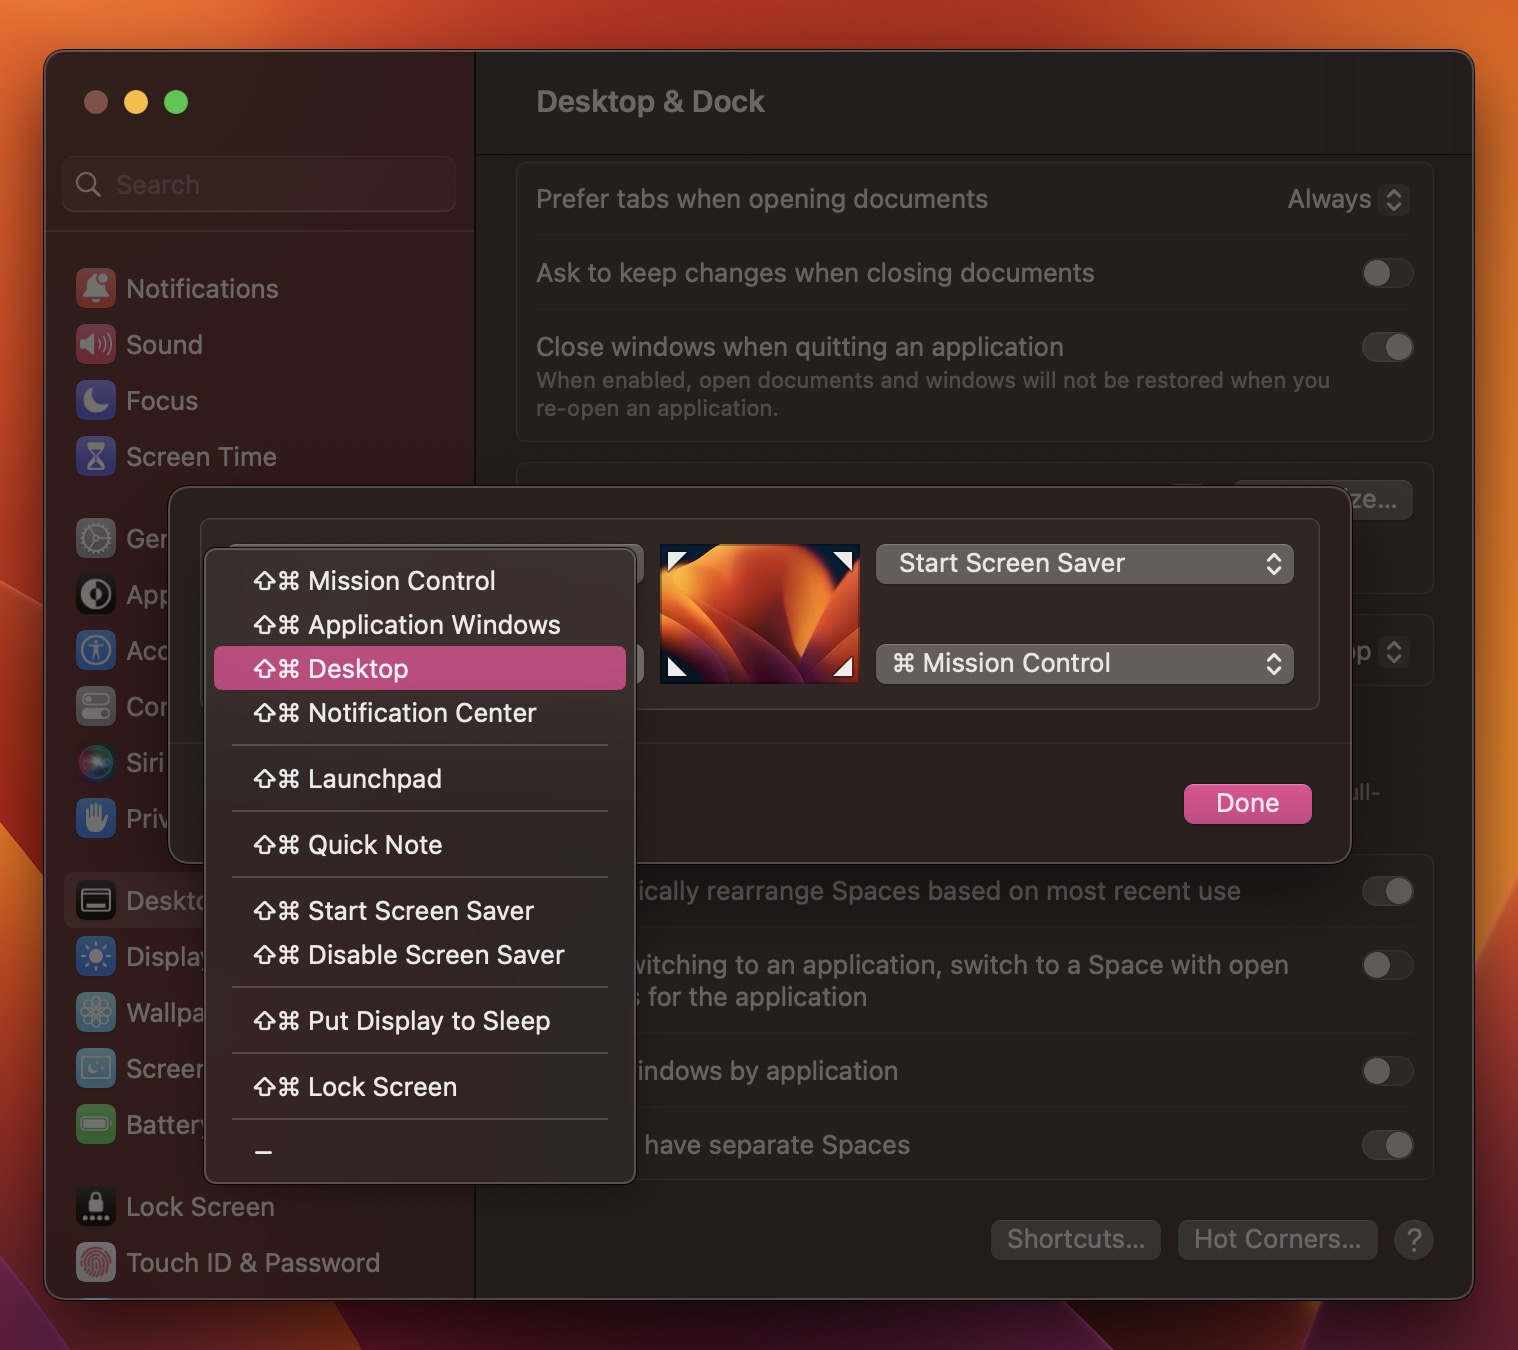
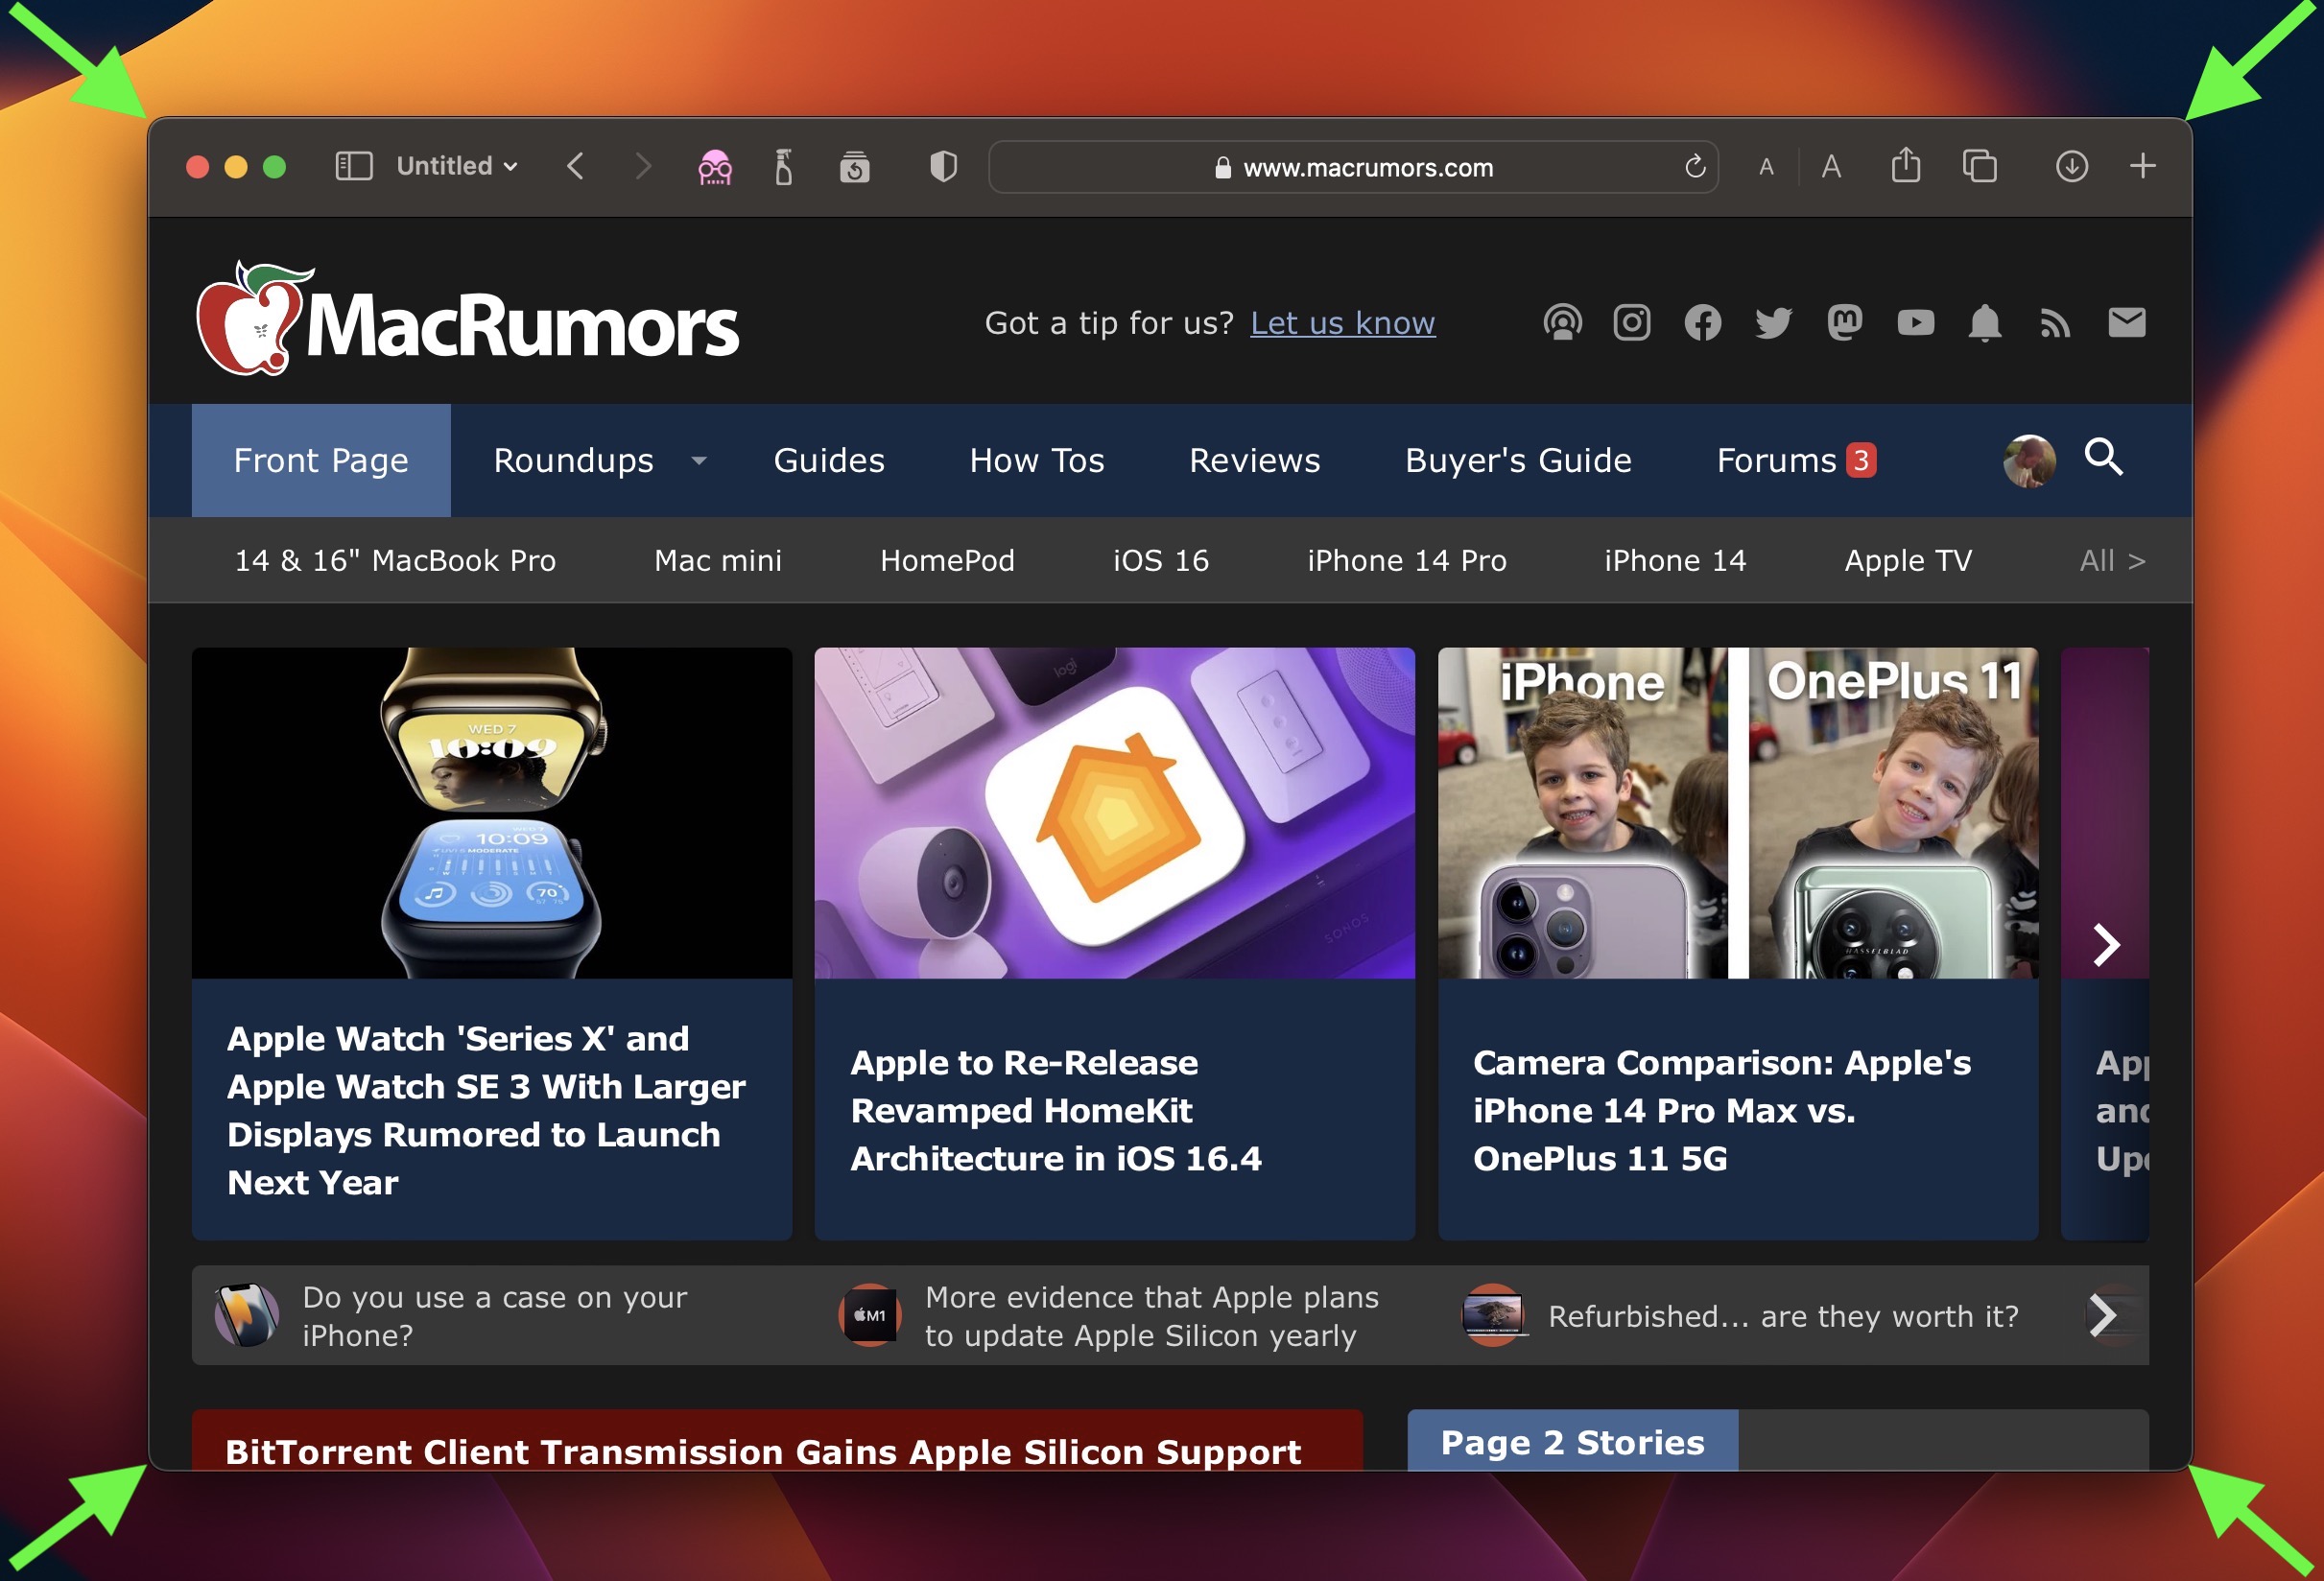
Open System Settings -> Desktop & Dock, scroll to the bottom of the menu, and click Hot Corners.... In the dialog box that appears, click the dropdown menu corresponding to the screen corner that you want to use as a Hot Corner. Next, hold down a modifier key and select a function from the dropdown to assign to the Hot Corner. We're using the Shift-Command in our example. Now that's done, the next time you come to use a Hot Corner, hold down the modifier key(s) as you move the mouse cursor towards it, otherwise the action you assigned to that corner won't work.
5. Show More Recent Applications in the Dock
In macOS, a handy option called "Show recent applications in Dock" (found in System Settings -> Desktop & Dock) adds a divider to the right-hand side of your Mac's Dock and after it displays any apps you recently used that aren't permanently docked. By default, this option only shows the three most recently used apps that have since been closed. However, there is a way to make it show more, which can be useful if your workflow involves using a lot of apps consecutively.

If you're comfortable pasting commands into Terminal, it's perfectly possible to increase or decrease the number of recently opened apps that show in your Dock. Open a Terminal window (the app can be found in /Applications/Utilities/) and paste the following at the command prompt, then press Enter:
defaults write com.apple.dock show-recents -bool true;
defaults write com.apple.dock show-recent-count -int 10;
killall Dock
Note that the -int argument defines the number of recently opened apps that you want to display in the Dock after the divider (10 in this example). You can change the number to suit, and you can revert back to showing three apps anytime by using -int 3 in the second command.
6. Resize Windows From the Center
When you drag your mouse from one side or corner of a window to resize it, you can hold the Option key to resize the dimensions of the window from its center point instead.
7. Get Unique Alerts for New Emails From VIPs
In Apple Mail, you can opt to receive notifications when you get new messages from your VIPs (click Mail -> Settings... in the menu bar, then click the General tab and select VIPs in the New message notifications dropdown list.) Setting up VIP alerts in this way is all well and good, but it prevents you from receiving notifications for all other messages coming into your inbox. A better solution is to set up a rule in Mail that plays a specific sound or bounces the Dock icon when a message is received and the sender is in your VIP list.
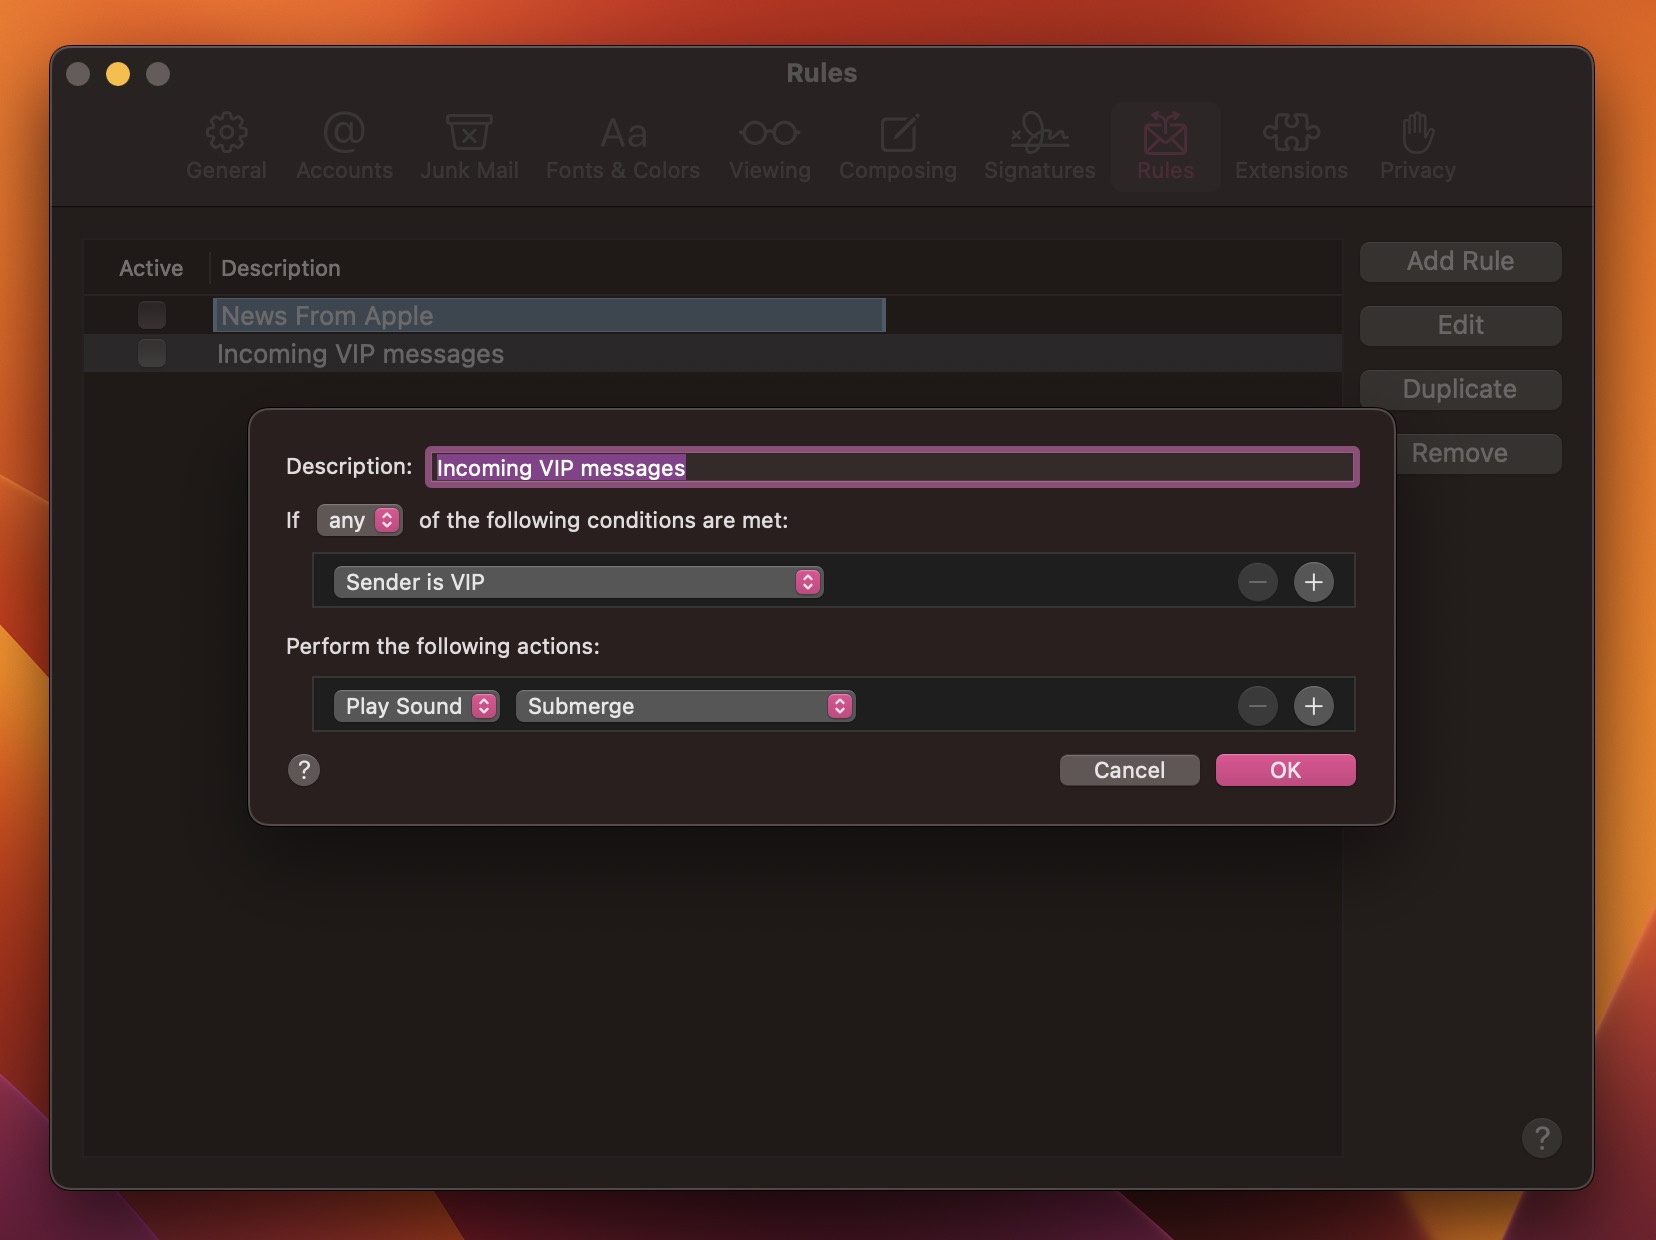
In Mail's Settings, click the Rules tab, then click Add Rule. Give your rule a name in the Description field, then for "If" choose any from the dropdown. For the first condition, select Sender is VIP. (If it's a specific person you want alerts for, an alternative option here is Account.)
Next, under "Perform the following actions:" select Play Sound from the first dropdown. (Another option available here is Bounce Icon in Dock.) Then under "Perform the following actions:" chose a sound to play from the second dropdown. Finally, click OK, then click Apply. With the rule now set up, you'll get a unique alert for every VIP mail you receive that you'll be able to distinguish from regular new message notifications as they come through.
8. Float Notes Over App Windows
In the Notes app in macOS, it's possible to float individual notes over other windows so that they stay visible regardless of which application is active. This makes for a convenient way to reference an existing note while writing an essay or report, for example. It also comes in useful if you want to take notes when researching something online.
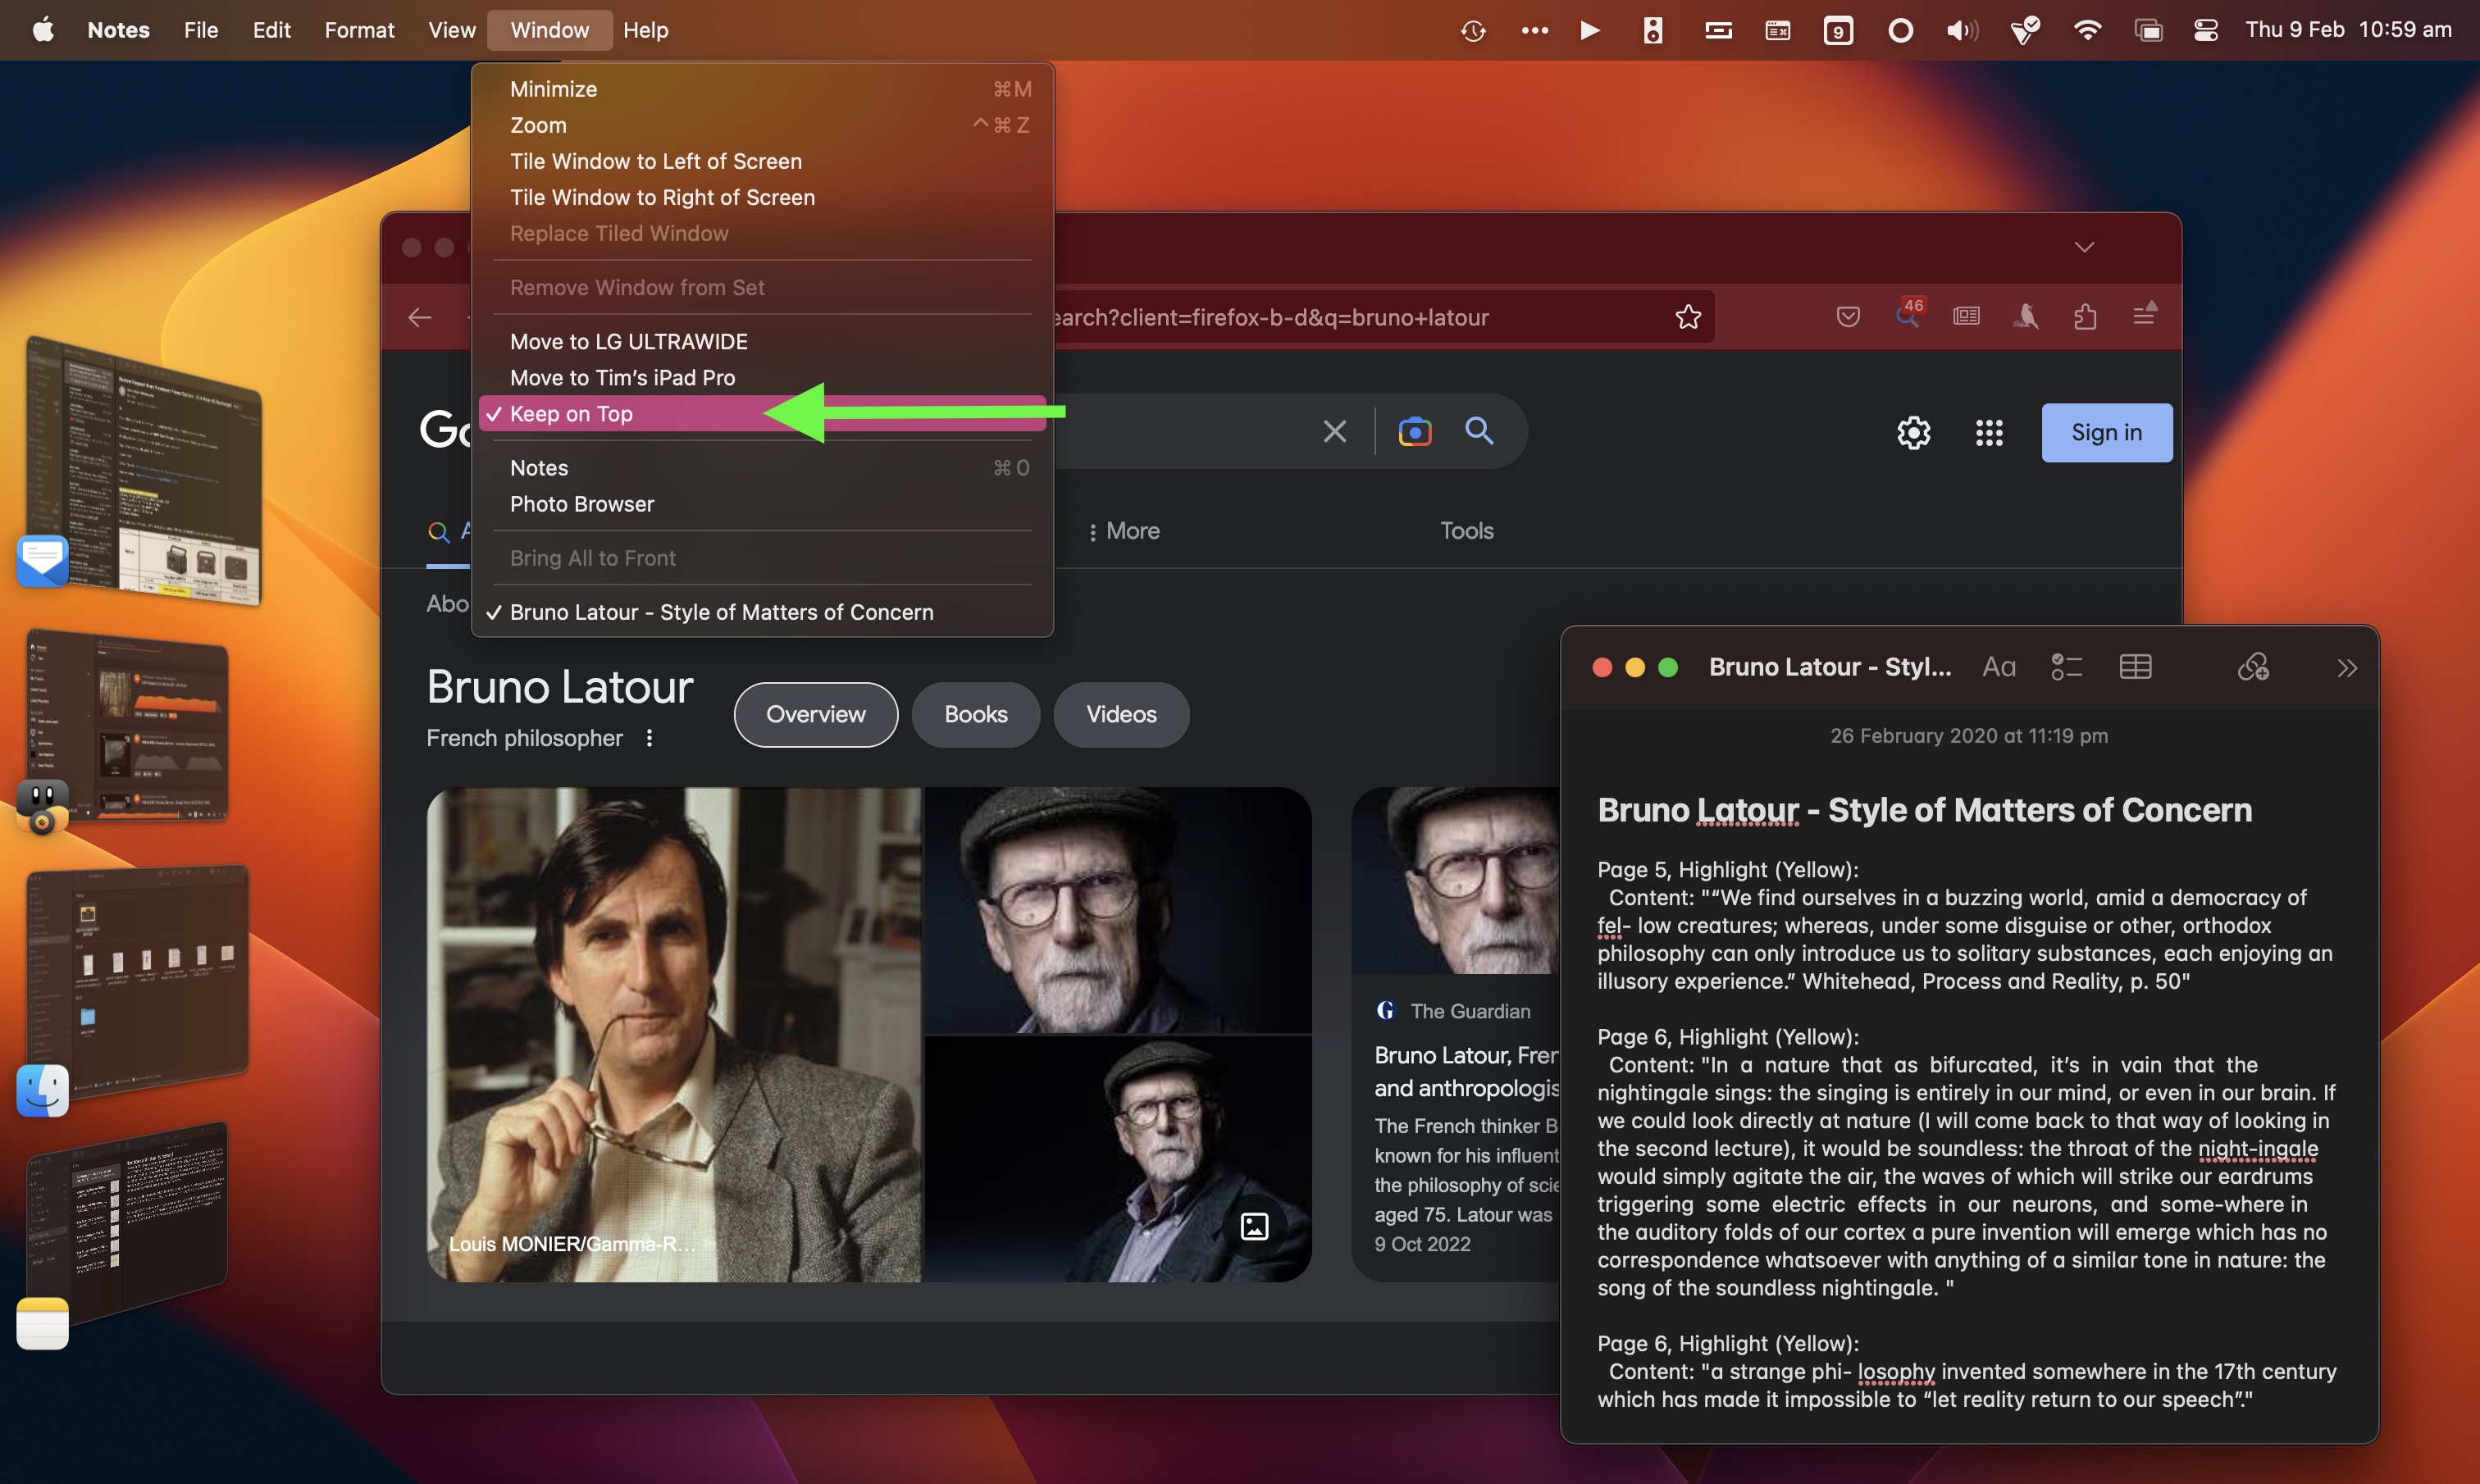
To float a note in the Notes app, double-click the note to open it in a separate window, then select Window -> Keep on Top from the menu bar. The note will now remain above other open application windows, even if you switch between apps using Stage Manager. Just remember that your floating notes can't share the same screen as another app that's in fullscreen mode.
9. Add App/File/Folder Shortcuts to Finder's Toolbar
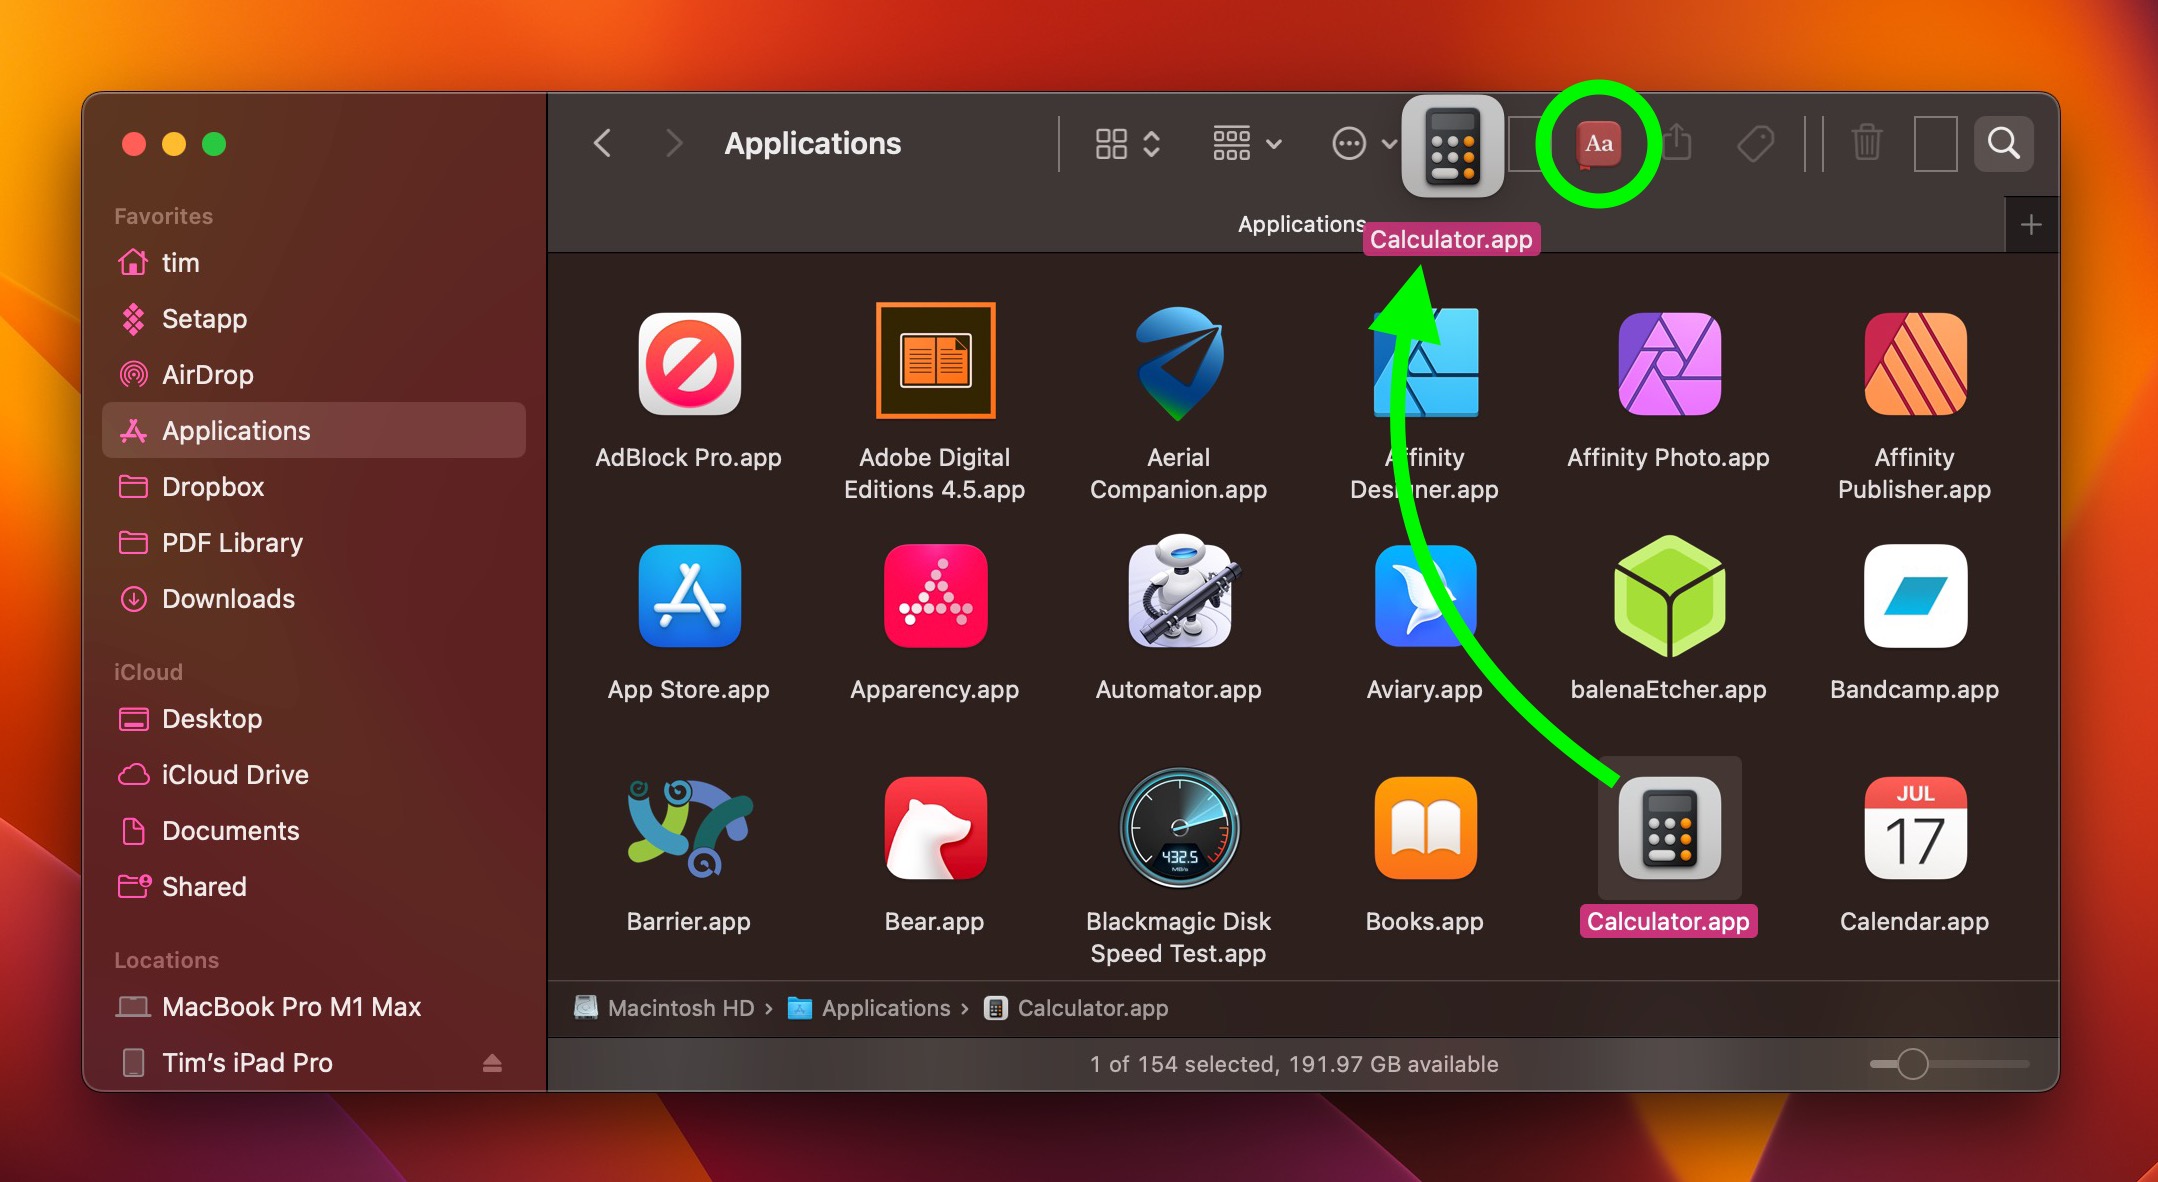
Here's how to add convenient app, file, and folder shortcuts to the toolbar of Finder windows: Simply begin to drag the item within the Finder window, then hold down the Command (⌘) key and drop it onto an available space in the toolbar.
10. Quickly Access Specific System Settings
If your Mac's keyboard has icons printed on some of the functions keys, you can press them to perform special features. For example, pressing the F11/12 keys with speaker icons adjusts the volume.
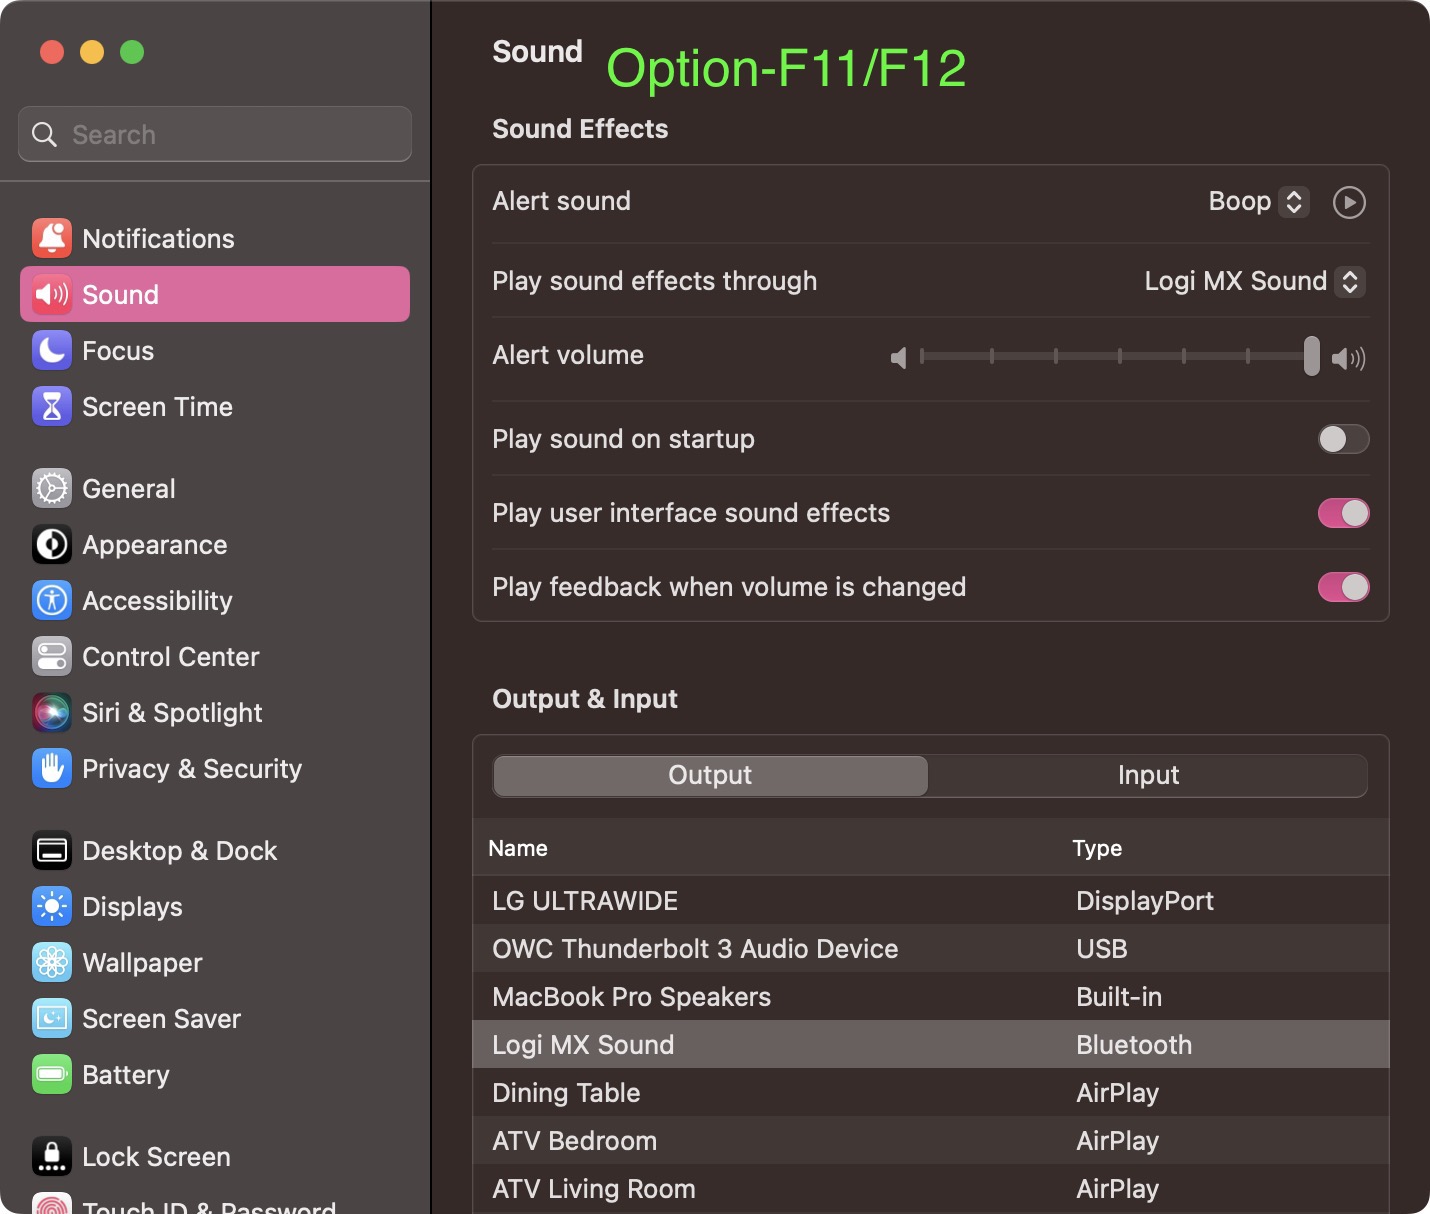
If you hold down Option when you press one of these keys, the specific preferences in System Settings that are associated with the feature will open instantly. Option-F11/12 opens the Sound pane, for instance.
This article, "10 macOS Tips to Make Your Life Easier" first appeared on MacRumors.com
Discuss this article in our forums

0 comments:
Post a Comment